
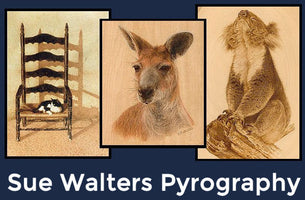
General Burning FAQ
General Burning FAQs
- Q: Can I burn on treated timber or man-made wood, like MDF
A: NO. Absolutely avoid burning on these materials. They contain carcinogenic materials are are not safe to burn on
- Q: Can I burn on plywood?
A: It's okay to surface burn on ply but be sure to only burn the top wood veneer. Avoid burning through to the glue layer.
- Q: What sort of ply is better to burn on?
A: Generally you need to look for a light-coloured timber that doesn't have a lot of grain pattern. Blond-coloured wood will allow the viewer to see your burnt design in greater contrast. A ply that has a less busy grain pattern will provide a larger 'blank canvas' to burn on. (Keep in mind that a grain pattern can be fun to work with. The pattern can be incorporated into the burnt design to create an imaginative piece of art.)
- Q: What ply species are best to buy?
- Q: I see basswood rounds with a natural bark edge are heavily featured in North American burning. Can it be found here?
A: No. Basswood is native to North America. The importation of timber into Australia is heavily vetted by AQIS. Timber with a bark edge is usually banned from importation. I'm sure there will remain some old pockets of Walnut Hollow slabs somewhere in Australia but tightened laws will prevent fresh stock from being available. Some non-barked slabs can sometimes be found at art supply and craft/carving supply stores.
Q: In Australia, is there a readily available timber that resembles basswood?
A: Yes, Jelutong is close in makeup to that of basswood. It is a light-coloured wood that has a soft density. It has a fine texture and there is no prominent grain pattern.
- Q: What species of wood, found in Australia, are best to burn on?
A: Most pyrographers prefer a blond-coloured wood because this shows the burnt design in higher contrast.
Some of the better blond timbers are: Jacaranda, Huon Pine, Sassafrass, Jelutong, Poplar, Birch, Maple, Ash, Mountain Ash, Tallowwood, Cedar and Brushbox.
Then we have the contentious Pinus radiata. It is, understandably the first timber that many people start to burn on. It is soft in density, blond coloured, easily found and it's cheap. The drawback is those pesky grain patterns. The busy grain is not only darker than the blond wood but it also burns entirely differently to it.
The blond areas allow a clear, even burn. In contrast, the resin-laden grain can pop, fizz and release liquid sap on contact with a hot nib. Grain areas also tend to burn in a pale colour compared to the possible black burn on the blond areas. This makes it difficult to marry the look of the burnt blond areas with those of the grain lines. This can result in the burnt design having a checked and patchy appearance.
Do I recommend burning in Pinus radiata? As long as you accept its limitations and prepare yourself for a challenge, there is no reason not to give it a crack. At the very least you will come away from the experience having learnt better pen control than what you started with. P.S. Keep a sharp blade handy so you can scrape away any dried sap eruptions.
- Can I burn on dark-coloured or heavily figured timbers?
A: It certainly can but you have to be aware that your burnt design will not stand out as clearly against a darker timber 'canvas'. Sometimes this will mean you will have to choose a bold and more linear design for it to make a stronger visual impact.
- Can I incorporate colour into my pyrography?
A: Absolutely! Many artists and crafters use colour in their pyro work. Once again, hit the internet and prepare to be amazed at the way colour can be used in association with pyrography.
Acrylic paints seem to be the most popular paint medium used in conjunction with pyrography on timber. Acrylic paint is water-based, vibrantly coloured, fast drying and tends to sit on a porous timber surface rather than being absorbed into it.
Watercolour, inks and oil paints can also be used, especially on non-timber surfaces but I believe you will find acrylic paints are the easiest to use on timber surfaces.
You'll soon find out that a burnt area will reject liquid pigments. When applied to these areas the liquid forms into balled droplets. This means that a burnt line will effectively form a moat against liquid. The result is the pyro artist can confidently paint up to burnt areas without fear of overpainting.
Coloured pencils are also a popular choice, especially polychromatic pencils. After application, some pencil pigments can be liquified with spirits. This technique can create some interesting results, especially when used on porous surfaces.
- Q: Can I burn on leather?
A: As long as it's vegetable tanned leather. Don't burn on chromium-tanned leather.
- Can I burn on gourds?
A: Gourds are an excellent object to burn on. You can even grow them yourself! Hit the internet and be prepared to be inspired by the
- Can I burn on animal bone or antlers?
- Q: Can I burn on plexiglass, perspex or acrylic sheet.
A: I know of some people who etch on these materials using a pyrographic tool. Caution: Toxins could be released when these materials are heated. If you do contemplate burning on this type of material please use ventilation.
My advice is to not burn on any plastics or acrylics etc. Only burn on natural materials.
- Q: Can I burn on found wood?
A: As long as you are sure it hasn't been treated. Fallen branches, driftwood etc can provide good materials to burn on.
- Q: Can I burn on paper?
Yes, as long as the paper hasn't been treated with chemicals when it is made.
- Q: Do I need to prepare the timber I want to burn on?
A: A smooth surface allows for smoother tip travel across that surface. Smooth nib movement equals a more consistent and neat burn. The finer you sand the surface, the easier the tip will travel.
Q: Should I varnish my finished burning project?
A: Yes. putting a protective finish on your wooden burning project will protect the wood and prevent it from drying out.
- What type of varnish should I use?
A: It depends on how you want your final project to appear. Acrylic varnish tends to preserve the natural wood colour. Because of this, the contrast between wooden canvas and burnt design should remain clear. Oil-based varnishes and oils tend to darken and honey the timber colour. Because of this, your burnt design will lose some contrast when viewed against the darker wood.
- Q: Does burning fade?
It can fade when it's kept in direct sunlight or artificial light. Deeper/darker burning tends to fade far less, if at all. Light surface burning tends to be more prone to the fade issue. Using a varnish with a UV filter can help. UV marine varnish will help protect burning that is exposed to the elements. Keep indoor projects away from direct light.
- Q: How do I protect cutting boards?
A: Food-safe mineral oils should be used to finish cutting boards. These can be shop-bought or self-made.
- Q: Does pyrography produce much smoke?
A: It really depends on how hot you are burning and what you are burning on. Texturing, cutting and heavy black burning will produce smoke. Light, controlled burning produces little if any smoke.
- Q: How can I prevent smoke inhalation?
A: 1) Tilt your work so that your head isn't hovering over the burning area. 2) Use a fan to DRAW the smoke away. Don't point the fan at your work. The breeze will cause the tip heat to fluctuate. As will the exhale from your breath if you are too close. 3) Use an smoke extraction and filtration system, such as the Razertip Razaire Mini Smoke Extractor.
- Q: What does the word 'pyrography' mean?
A: It means to draw by fire.
- Q: Where do I source wood to burn on?
A: In Australia we don't have a lot of ready made timber slabs and factory blanks to burn on. Some pre-made wooden objects can be found in shops like Lincraft, Riot Art and Spotlight. A search online will also reap some rewards. There are a lot of online school and craft supplies and a few places that sell pre-cut wooden disks and slabs.
Natural timbers will need to be sourced in your local area. A good place to ask is at woodworking clubs, Men's Sheds and Australian online woodworking forums. These are the people in the know as to where bark edged slabs etc can be found. Many also have a pyrography section in their organizations.
Plywood needs to be sourced at a proper plywood or cabinet maker supply shop. They have the better grade of plywood that is far easier to burn on. You will be disappointed burning on the construction plywood that is found at general timber supply outlets.
- TAKING PHOTOS of pyrography can be frustrating because of flash glare kicking back off the irregular and shiny surfaces of the work. To help, tape a few layers of tissue paper over the flash to diffuse the light. Vaseline (petrolium jelly) can also be carefully smeared on the flash window.
- A CLEAN NIB is ESSENTIAL for good burning. Skews and cutting pens should also be kept sharp. A build up of carbon and muck will hinder good heat transfer and smooth travel of your nib across the surface.
- PHOTOS COPIES and laser prints can be used to transfer images to your wood to burn. Print the image, place face down on the wood and gently iron the back. Perhaps even a better way is to rub the back with turpentine (mineral spirits). Remember though, the image is a reverse of the original.
- THE HEAT CONTROL OF YOUR NIB can depend on many things. The temperature dial and the size of the nib you have attached are the most obvious. There is however one other, non-mechanical method of heat control...your breath. Think of this as the fine tuner of your heat control. I will often gently blow on the nib to take the edge off the heat if I need to tone it down while working. This is especially useful when working with a shader and doing very subtle grades of tone. While working, if you get to a patch that needs a softer heat, you simply, ever so softly, blow down on the nib rather than taking you pen off the work and turning the dial down. When you need to have the full heat back to the nib, simply stop blowing. It's also useful for taking the edge off the nib heat before touching down on a surface, to avoid the dreaded black blob.
- THE DREADED BLACK BLOB can also be avoided by keeping your nib in motion when touching down on the surface, as well as when you lift back off. Think of your nib as a plane about to land, keep it in motion as you land...taxi along, then lift off again. I know...it seems awkward at first, but soon you wont even be thinking about it.
- THE HEAT OF YOUR NIB depends on many things. The machine you are using; the condition it's in; the size of the nib you are using; how clean the nib is; how clean and flush the contacts are; the type of material you are burning on; your power point; how cold the day is; if there is a breeze; how fast or slow you move the nib across the surface and how much pressure you use. It's one of the reasons it's impossible to tell people what setting to use when burning....there are simply too many variables. About the closest we can get is cool, medium and hot.
- PYROGRAPHY IS LIKE DRIVING A CAR. It seems such a lot to remember when you start out...a heap of variables to enable you to make the perfect, smooth line. But trust me, it's just like learning to drive. At first you are conscious of every move you must make to make the car drive smoothly, as well as steer!! It's just the same with pyrography. And just like the car, soon you'll no longer be conscious of what goes into driving you burner. that's when you'll start doing your best work.
- TEXTURE Don't think of your woodburning tool as just a hot pen or pencil. The burning tool is one the few writing implements that can texture as well as draw. When looking at a prospective subject, don't just think of it in terms of light and dark tones, think of it also in terms of TEXTURE. Everything has texture, from the smoothness of a shiny apple, to the coarseness of a bison coat. Depending on the nib and your imagination, the pyro machine has the ability to recreate just about any texture you will find in this world.
- PRACTICE! Trust me when I say, practice really does help a great deal in perfecting your pyrography. Pyro is not just a visual thing, it is also a 'feel' thing. It's not like picking up a pencil and drawing a line. Practice will help you 'feel'what you are doing and improve your work by leaps and bounds. (I know...LOL...should see some of my early work!)
- MONOCHROME is a term you will often hear in pyrography. It technically means a picture done in a range of tones in one colour...for us it means burning a picture without the use of colour.
- POLYURETHANE varnish tends to yellow wood, creating a honey glow but also causing the picture to lose some subtle contrast. Water based varnish looks almost milky in the can. It's use allows the wood to stay close to it's 'raw' colour.
- FADING Most pyrographers know that burning can fade if put in direct light, especially fine, subtle burning. A UV protective additive in your varnish/finish will help prevent fading.
- TRACING It is far better to use graphite paper than carbon paper. Carbon paper will bleed badly when heated, staining the wood. Graphite can be rubbed out or wiped out with a damp cloth. This will raise the grain of finely sanded wood though, so I prefer lightly sanding heavy lines or using a white rubber.
- ERASING pyrography is difficult, if not impossible in some cases. One way to lighten burning, correct mistakes or make highlights on the wood is to use the side of the blade to gently scrape away the burning. I find a blade gives good control and a more natural finish than sandpaper.
- PERSPECTIVE Be sure to stand back now and then to gain perspective. Sometimes, because we burn so close to our work, we get a little lost in the details. Try standing back now and then to see the picture as a whole. I do this when something just isn't working. Distance will give me a better feel of the balance of the piece....especially if I'm not sure if a certain part should be lighter or darker.
- REST YOUR EYES It's also a good idea to take a break from a particular piece if you are struggling with it. It's amazing how fresh eyes will find the solution much faster than tired ones.
- WHAT TEMP SHOULD I SET MY DIAL AT?
Some of the variables are:
1) Machine selection. Some machines burn incredibly hot at a low dial range where others are more gentle and have a larger heat range. This will determine greatly the temperature dial you set to burn certain areas.
2) The cord. The gauge or thickness of a cord will also help determine where to set the dial.
3) The amount of metal used in tip construction. A shading tip has a lot more metal used in its construction compared to a thin skew or a small writing nib. The most important thing to remember is the more metal used in a tip, the more power it will need to burn an impression. Less metal used in the construction of the tip will mean that less power is needed to heat that tip and burn an impression. Because there are numerous types and sizes of tips on the market you can see this one area can greatly determining the heat setting of your dial. Dial setting 7 on my machine might be perfect for burning with a large shading tip, but that same heat setting will see a small skew glow red hot and be unsuitable for controlled burning. This is one reason I always recommend people have a scrap piece of material next to them to determine the correct heat setting after they have changed to a new nib.
4) The material being burnt on. You will find that a cooler tip temperature will make a decent burnt impression on basswood, but that same tip temperature won't make a dent on a more dense timber. All woods tend to burn at different tip temperatures. Even the same species of timber can burn at different temperatures, depending how dry it is…oily it is…and so on. The same applies to other materials. You will only need a gentle heat to burn on leather but you will need a red hot tip to burn on bone. It's important to always have a scrap of the same material you're burning on, set aside, so that you can practice your strokes and get the right tip temperature that is relevant to your project material.
5) Hand speed. If you tend to burn with a quicker hand motion you will need your temperature dial turned up slightly more compared to somebody that burns with a slow hand motion. This is because the person with fast hand motion will need a hotter tip to make an impression in less time compared to a slow tip speed.
6) Clean tips. The dirtier you tips the less evenly and cleanly they will burn and you will find that you will need a slightly higher temperature compared to clean tip burning. This is particularly important to remember when you're using interchangeable pens and tips. If the grooves of the pen or the metal posts of the nib are getting dirty there will be less clean conduction and therefore you will have to turn your temperature dial up more to burn the same impression compared to a clean rig.
7) Air temperature/breezes. If you're burning in a cooler room you will require more heat temperature than you will in a warm room. If you are burning by a window and breeze is moving across the burning tip this will also drop the temperature of the tip and you'll have to turn your temperature dial up. It's important to remember that environmental temperature and other working room variables can affect the temperature dial settings. This is also true of power points. Some power points give a better current than others and this can also affect how high or low you should set your temperature dial to burn the same impression.
8) Tight connections: if you have loose connections then the current cannot move smoothly to the tip and this will also affect your temperature setting, you will have to set it higher to make the same impression than if you had tight connections.
9) Sub adjusters. Some companies like Razertip do have sub adjusters on their dual burner machines. This sub adjuster can be adjusted high, medium, low or any other range in between to change the temperature range of the dial. This means if I am burning on leather I would turn my sub adjuster down to provide a comfortable burning range for that particular material. If your machine has a sub adjuster then your heat setting at 6 might be entirely different to my heat setting at 6 depending on where my sub adjuster is set.