
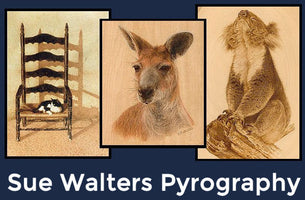
Newsletter 6
I LIKE leather burning a lot! There's something about not having to fight grain that I like. Perhaps it's because I lack patience. But I must admit I also like the look of it...the earthy tones and unique marriage of burning to hide.
There are some amazing examples of leather burning on the net, but I was first introduced to it by a generous and gifted artist named Adri Pretorious. If you want to check out some great leather burning then a visit to Art By Fire will do you well.
Thanks to Adri I learnt the basics of leather burning but, because of other commitments, I never found the time to do much of it. I've finally had a chance to try now because I decided I wanted to develop a small range of wildlife sketches on leather for sale. This came about for two reasons; to diversify my art (see When the Market Stall, bellow) and also because I can work fast on leather.
 |
It's a lovely material to burn on when you have a decent piece of leather. The ability to use a shader to broadly sketch seems a lot easier than on other surfaces...this I like because I admit to getting a little impatient with how slow burning can be at times.
Leather needs a cooler heat to burn on so a burner with the capability of a low heat is required. This makes a lot of the fixed temperature irons perfect for leather burning as they tend to be cooler than some other burners.
You can go whole hog and try every nib in your kit if you want but I found that using a skew (knife like), a spoon shader and a writing nib were all I needed to get the effects I wanted. There really is no need to go and buy extra gear. The most basic nibs will work easily on hide. (Remember, there is no grain to fight.)
It's important that you only burn on vegetable tanned leather. Some leather is treated with metals and chemicals and this is dangerous to burn on. It's usually the soft leathers used in clothing etc, that are treated this way.
 |
Here lies the biggest problem I've heard regarding burning leather; that it's hard to find nice clean leather that's good to burn. It's either too dark, too marked, to thin or not the right size. So I ended up going to a special leather merchant and hand picking a side. It was very expensive but well worth it because I know exactly what a pyrographer needs and can pick the best myself.
While I was there I bought a Kangaroo hide too. I must admit I wasn't keen on this because I love the Roos, but they do have to be culled to prevent them starving to death when the numbers are too high, so that eased my conscience a little.
I've tried burning on Roo hide once before and found it a good surface. It's a little thinner than cow.
After I bought the hide I got to work sketching up some critters, deciding to focus on Australian wildlife themes and dogs. I say they are sketched because I have limited each one to being done in an hour or less. I can't afford to take the time to get them perfect because this will make them too expensive to sell quickly. The aim is to do them fast and have them priced to appeal to a wide range of shoppers.
The positives? It was FUN! I found I could go from the softest of tones, right through to black. It held a tight line very well and the control of lines seemed to be easier because the nib was sunk into the surface, making it bite in and steady the line. It was faster than wood burning and I liked that you can easily scratch back into it to highlight. It looks very unique and creates quite a talking point. It's also easy to mount of frame for presentation. The other plus is you can do it on functional items: belts, bags, horse gear etc.
The negatives? It pongs! (Aussie/British for 'smells', 'stinks'.) I didn't actually mind the smell at all, but I can see if you find the smell of burning hair a bit on the wafty side, it might put you off a tad. (Not that I'm into that particular smell, but you get my drift. Some people have far more sensitive honkers than mine.) The leather took the heat very nicely if it wasn't turned up too hot, but if I tried burning too hot it almost melted the leather. This is simply a control issue as you really don't need a glowing heat. The burn itself is dirtier than wood. It didn't seem to smoke much at all, if ever, but the nib did manage to gunk up a lot compared to wood. The other drawback I can envisage is, if the leather is too dark you could have a lack of contrast in your work if burning monochrome. (I'm yet to try colour but am very much looking forward to it and will report in to you on this experiment.) One last negative is that leather can darken in strong light, so keep this in mind when hanging...just like you must with wood burning.
All in all it impressed me enough to know I will continue working with it in the future.
.
.

.

.